

Yes, I
can. I have a can-do attitude about
home canning. Let’s do the can-can in
my kitchen. How about I kick the can
around and see what I can come up with?
OK, I’ll
knock it off. But, I have always had a
certain fascination with home canning. Perhaps
it is something about those perfect vegetables or luscious jams and spreads
preserved – seemingly for years – in glistening glass jars. A jar of homemade preserves exudes a certain
rustic charm. My farming immersion of
the past several years has continued to stoke an interest in canning. Just how many ways can you preserve all that
stuff that pops out of the soil between June and October? Yes, I’m fascinated, but I’m also
fearful. There seem to be an awful lot
of warnings associated with home canning.
So, when Caroline
Fanning – head grower at Restoration Farm – suggested a home canning workshop
for CSA members, I relished the chance to learn more.

Caroline
walked us through the basics – high acid and low acid foods, boiling-water
processing and steam-pressure processing, and sterilization of jars, bands and
lids. We processed jars of apple butter,
which were delicious. Within two hours
or so, I’d gained the confidence to strike out on my own.

For my
maiden voyage, I decide to stick to what I know, and plan to cook up a batch of
apple butter. Caroline had made hers
overnight in a slow cooker, which I consider ingenious, yet here’s where I
start to encounter some problems. Every
recipe is different, and the one I select contains two cups of cider and a
quarter cup of lemon juice. That’s a
lot of liquid, and when I wake up on “canning morning” my diced apple chunks
are floating in a lovely cinnamon-scented soup. It doesn’t come close to “butter,” looks
alarmingly un-spreadable and I’m certain it won’t “can” appropriately. There’s also a lot of sugar in the
recipe. I have a sweet tooth, but I’m
not a sugar addict. Batch #1 is stored
in the refrigerator and will make a decent applesauce dessert for the next week
or two.

I go back to
Caroline for her recipe. She demurs
that her approach is “not anything worth committing to paper” but I’ve tasted
the results already, and it’s good. Here’s
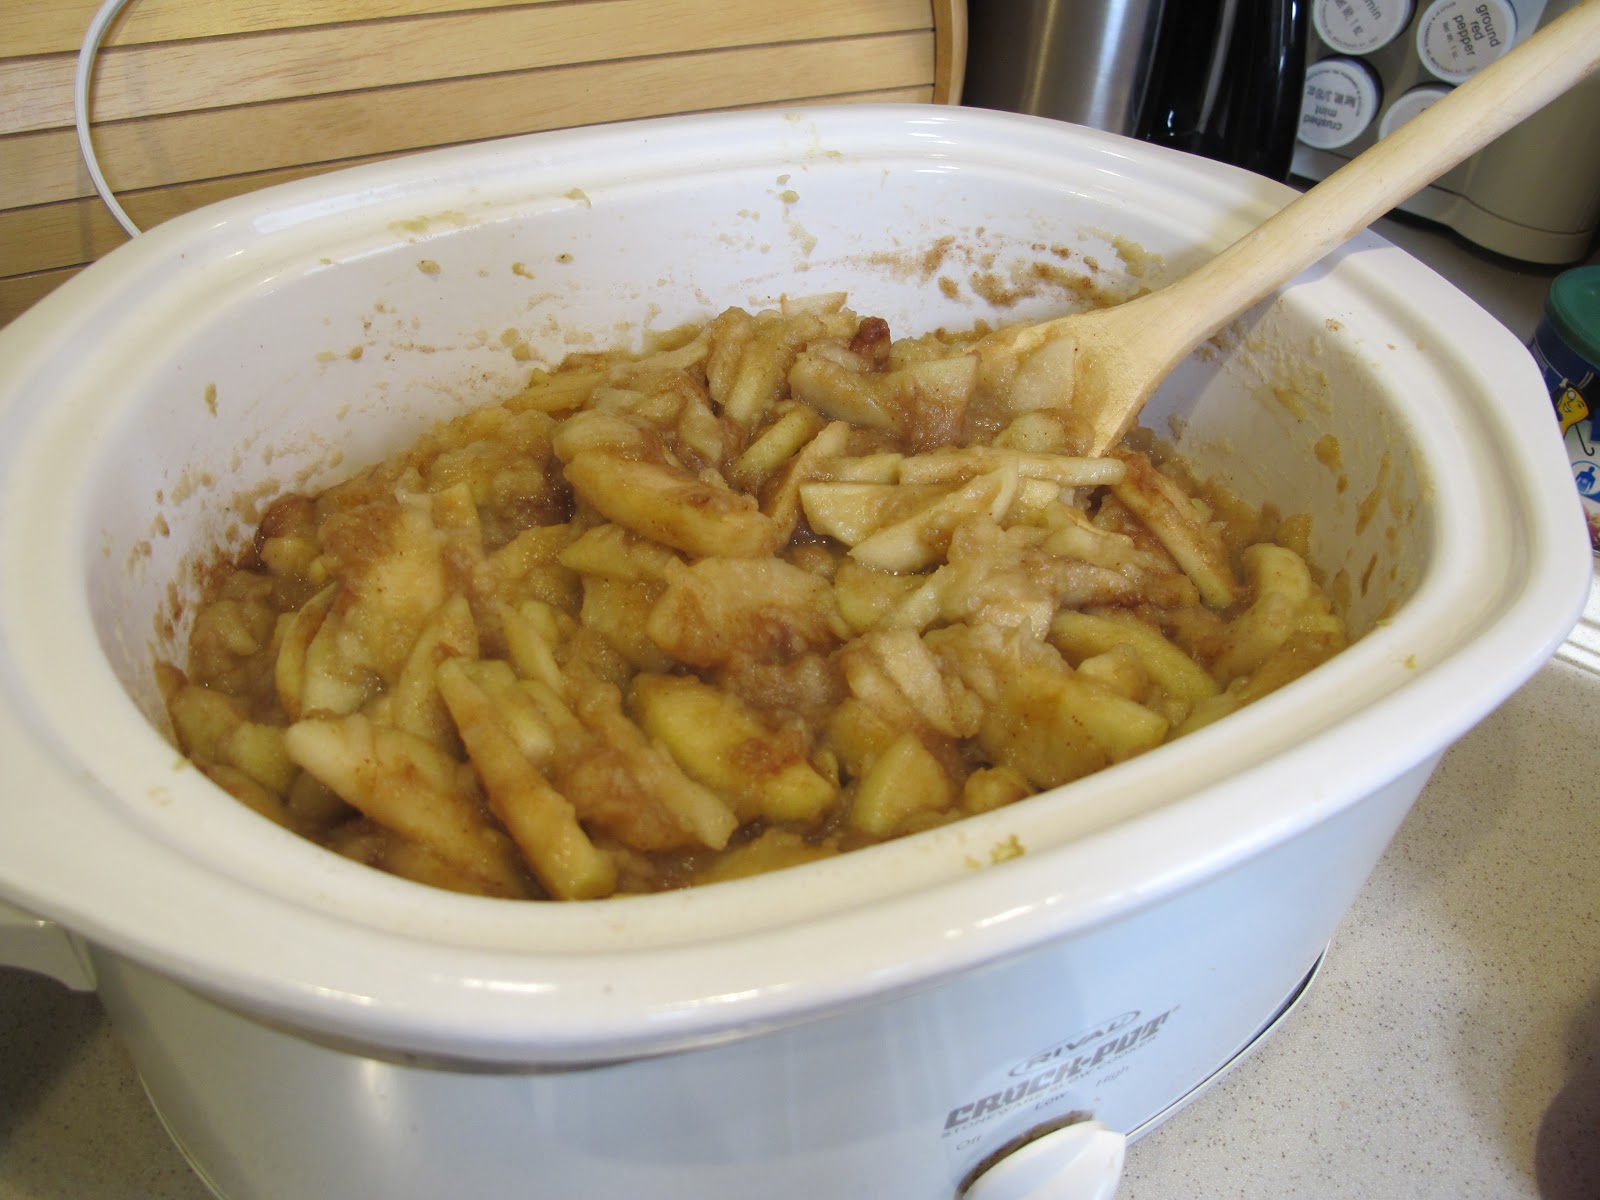
what Caroline recommends: “I peel,
core, and slice enough apples to fill a crockpot (or several crockpots). Then I set it on low for 8-10 hours, or high
for 6-8 hours (I usually do this before going to bed). After the apples are mushy enough to stir
with a spoon, I add a generous sprinkling of cinnamon and a less generous
sprinkling of cloves. It’s very
unscientific, but my results are surprisingly uniform.”
I give it a
shot. (For anyone who’s counting, I’ve
probably purchased about 10 pounds of apples for round one and two of this
little kitchen project.) I slice up
Granny Smith apples, use a teaspoon of roasted Saigon cinnamon, a ¼ teaspoon of
cloves and a ¼ teaspoon of roasted ground ginger because I like it. The apples release some liquid, but the
result is much chunkier and spreadable.
The recipe is still sweet, without any added sugar. Sometimes, art wins over science. And, the house smells fabulous, too.

With the
apple butter bubbling away in the trusty crockpot, it’s time to start the
canning process. From here, it’s
relatively simple. First, you have to sterilize the jars, lids and bands in
simmering water. I’m now the proud
owner of a boiling-water canner, which is roughly the size of one of those
water tanks that sits on top of a typical New York City apartment building.

The hot jars
are filled with hot apple butter. You
have to leave a ¼ inch of head space at the top of each half-pint jar, and then
you use a magnetic “wand” to lift the lid from a pot of simmering water and
place it on the top of the jar. Then,
the band is screwed on lightly.

The filled
jars are submerged in the vat of boiling water and the pot cover is placed on
top. There is steam everywhere. I can feel my pores opening up.

The recipe has filled seven half-pint
jars. Not a bad outcome for a first
try. Apple butter is a high-acid food
that is processed in a boiling-water canner.
The jars are processed for ten minutes. A temperature of 212° F kills
any pathogens. That’s a plus as I’m a
little neurotic about food safety.

When the ten
minutes are up, I remove the cover, and let it sit for five minutes. Then, each jar is removed from the bath to
the counter. You can hear the lids ping
as the vacuum seals are completed. A
concave lid indicates a good vacuum seal.

The
collection of finished jars of apple butter looks impressive. I’m proud of myself. I’ve conquered my fear of canning and I’m on
the start of a new culinary journey. If
you’re fearful of home canning, just think of me and read the instructions. And, if you have the ability to observe a friend canning, it is hugely helpful. It can be done. (Has anyone noticed how often
the word “can” appears in the average sentence?) I can see myself producing some nice blueberry
jam after picking out on the East End of Long Island next summer. But, I’m not
going to go crazy and start canning everything in sight. Pickled beets? I don’t think so. No intervention will be
necessary.
The Ball Blue Book Guide to Preserving is an excellent and easy-to-understand resource
for anyone who wants to learn the basics of home canning.
©2013 T.W.
Barritt All Rights Reserved


